Create a Flexi Capybara for 3D Printing
In This Article
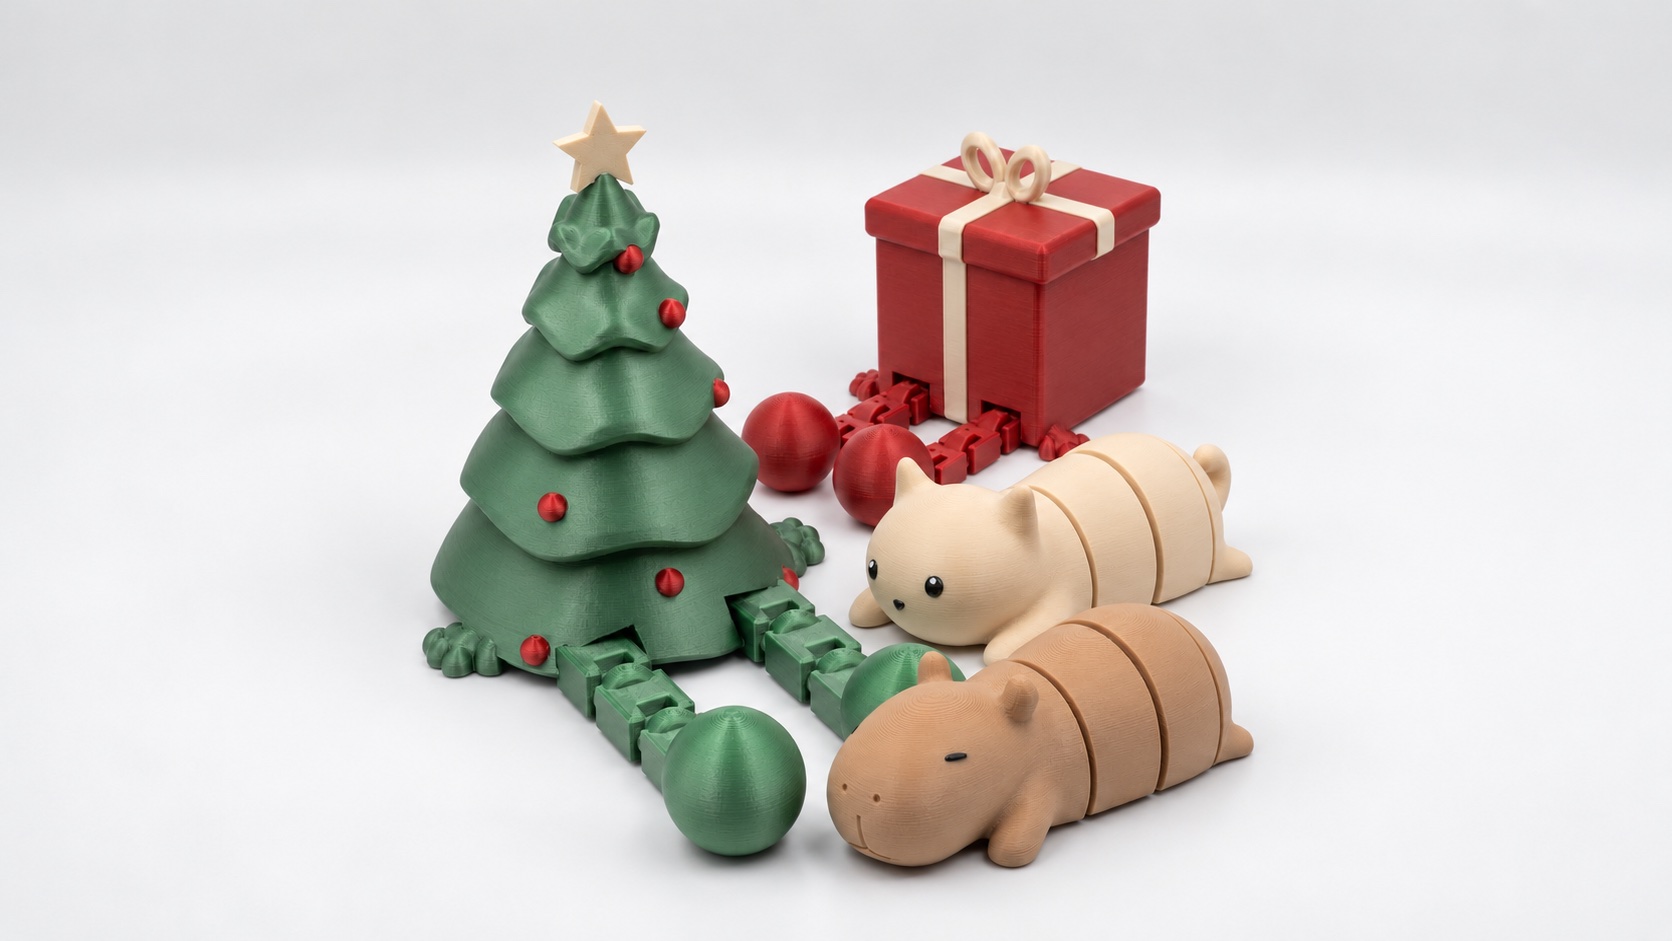
Design inspiration: articulated animal and holiday toy forms from the PrintVerse collection.
The capybara’s sleepy face is a good place to begin. Its rounded body is divided into connected sections, giving a familiar little animal an articulated structure you can explore and customize.
PrintVerse’s Flexi tool creates models from a collection of six templates. This walkthrough uses Capybara and takes you through the choices that matter for a first design, including how to review the joint gaps before printing.
Choose your character
The template grid contains Gift, Christmas Tree, Snowman, Round Cat, Little Bear and Capybara. Start with Capybara and allow the model to finish preparing.
The animal’s body sections are connected by internal joints. The festive characters use articulated legs. For your first experiment, keep the template’s starting proportions and joint settings so you can learn how that design behaves in your own print setup.
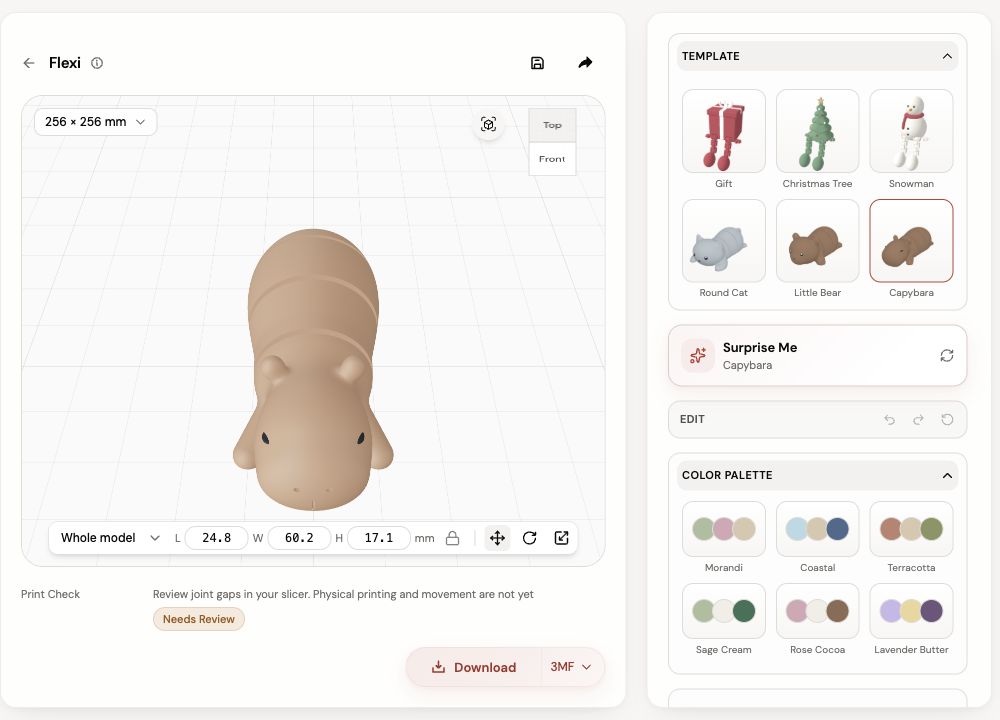
The current capybara is about 60 mm along its long axis at the starting size. Read all three dimensions below the preview when checking fit.
Make a color choice you can reproduce
Keep the warm brown starting color, or choose a Color Palette. Open Body for the available body and face controls. Individual parts have their own settings, so take a moment to check which part is selected before changing it.
A single-color trial can help you focus on the shape and movement first. If you prefer a multicolor version, use 3MF and map the imported regions to your available filaments in the slicer.
You can also inspect the Loop settings if you want to attach a cord. Check the hole size against the actual cord and assess the attachment after printing.
Understand what print-in-place means
A print-in-place design places moving parts together in the printing layout, leaving small gaps between them. The printer needs to preserve those gaps so the connected sections can move after printing.
This makes the space around each joint important. Changes to size, extrusion or the first layer can affect the result. Keep the starting mechanical settings for the first trial and make later adjustments one at a time.
The editor displays the print layout. The capybara’s straight position helps you inspect its sections and prepare the file; movement is something to assess on the finished trial print.
Use Print Check to guide the review
Flexi currently asks you to review joint gaps in a slicer and states that physical printing and movement are not yet verified. Treat the first print as a practical fit and movement test.
When the model finishes preparing, choose 3MF or STL beside Download and complete the steps shown for your account. Open the file in your slicer with the printer and filament profiles you intend to use.
Work through these checks before sending it to the printer:
- Confirm dimensions and orientation. Keep the exported print arrangement while checking that every physical section has the intended contact with the bed.
- Follow the joint gaps through the layers. Look for separation between moving parts and for features that begin above an empty area.
- Inspect support placement. Review any proposed supports near a captured joint, including whether they could be removed afterward.
- Keep the assembly organized. Imported color regions belong to their physical sections; preserve their registration when assigning filaments.
Ordinary PLA with a 0.4 mm nozzle and 0.2 mm layers is the project’s starting setup for print review. Use the filament maker’s profile and adjust from actual results on your printer.
Learn from one trial print
Let the print cool, then inspect the seams and move the sections gently. If a joint is stuck, examine where the gap closed before trying another print. First-layer spread, material flow and support placement are useful places to check in the sliced preview and finished object.
Record the settings that worked alongside the saved design. Once the first capybara moves as intended, you can explore another color or template with a useful reference point.
Customize your capybara. If you would like a simpler flat project alongside it, try the flower coaster.
Share this post
More to read
Author

Nora Lin
Nora explores playful shapes, thoughtful gifts, and small objects that make a space feel personal.