Make a 3D Printed Heart Tray in Your Browser
In This Article
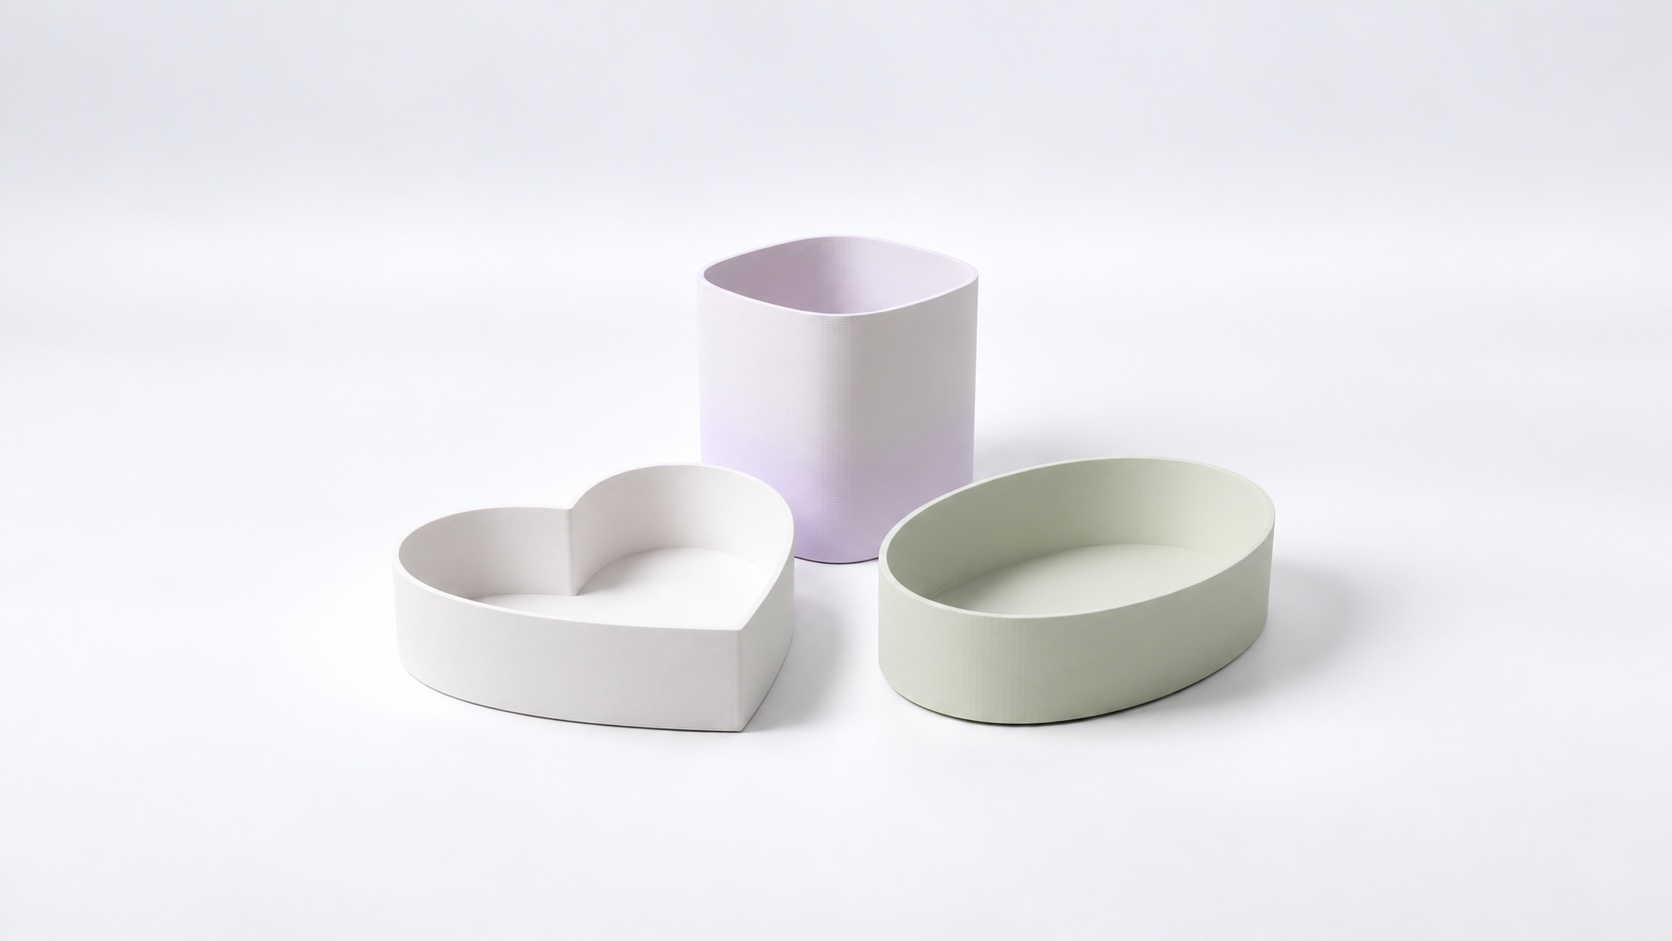
Design inspiration: a heart tray for small objects, a pen cup and an oval catchall.
Give the rings, hair clips or keys on your desk a little place to land. A shallow heart tray is a useful first project because its outline does most of the design work: a few curves, a low wall and a flat base.
PrintVerse’s Container tool turns a closed outline into a 3D object with walls and a bottom. In this tutorial, you will start with the heart, understand its dimensions and prepare a model for printing.
Meet your starting tray
The editor opens with a heart-shaped container. The right panel contains Draw Path, where the outline lives, and Physical Size, where you set its depth and thickness.
In the example shown, the tray measures approximately 132.9 × 126.5 × 20 mm overall. Its wall is 1.2 mm thick and its bottom is 2.4 mm thick. These are model dimensions for this example; use the live dimension readout after making changes.
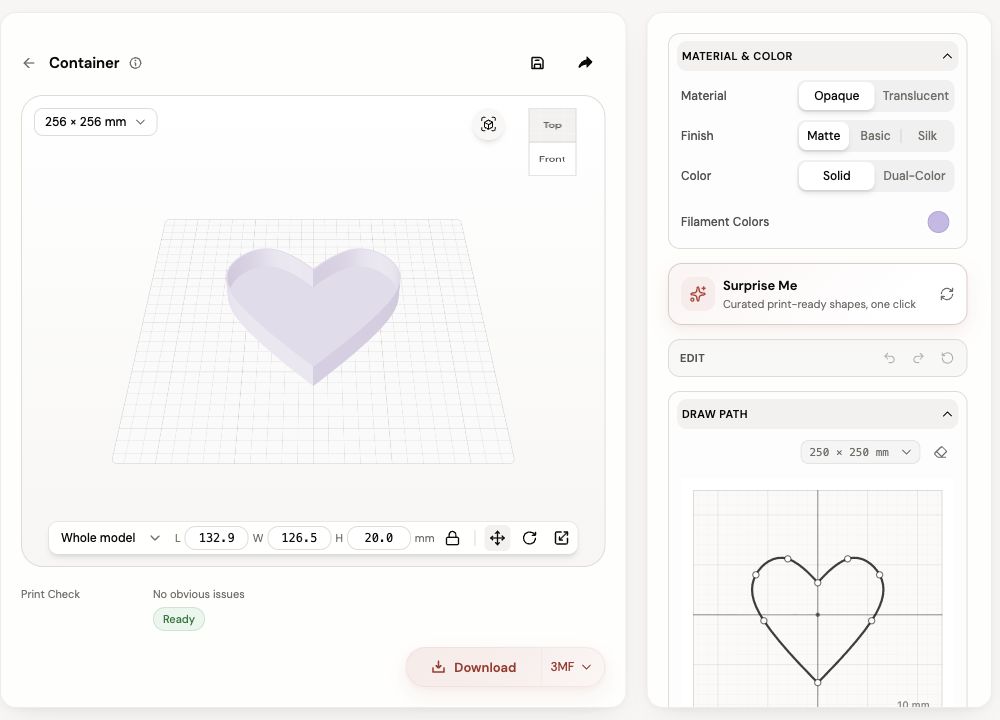
The drawing on the right defines the wall’s centerline. The 3D preview shows the resulting walls and floor.
Shape the heart
For your first tray, keep the original outline and explore the preview. A top view helps you judge the two rounded lobes and the space inside; an angled view reveals the wall height.
To personalize it, drag one point in Draw Path a small distance. Click a path segment to insert a point, then use the selected point’s curve handles to soften the outline. Keep neighboring curves flowing smoothly and leave enough room around the inward dip at the top of the heart.
The path stays closed. If two sections cross, move the points apart until the outline forms one clear shape. Undo is useful when a small adjustment changes more of the curve than you intended.
The drawing-view selector changes the area you see in the editor. Check the 3D model’s dimension readout to determine its physical size.
Set the depth for what you will keep inside
Open Physical Size. Leave Extrude Height at 20 mm for the first shallow tray. You can click a numeric value to type a precise measurement.
Wall Thickness grows to both sides of the drawn centerline. Increasing it makes the wall thicker and reduces the space inside. Bottom Thickness sets the floor beneath your items, so increasing it also reduces the usable depth when the overall height stays the same.
Think about the object you want to keep in the tray. A ring needs little depth; a bundle of hair clips benefits from more room. If you are fitting a particular item, measure it and allow space around it rather than matching only the outside dimensions.
Pick the color, then review the shape
Choose a filament color in Material & Color. A light tone makes the inner wall easy to see while you check the model. Rotate the tray and inspect the heart’s bottom point and upper dip, where tight curves can become crowded as walls grow thicker.
Read Print Check after your final edit. If a detail looks cramped, soften that section of the outline or make it more spacious. Save your project if you would like to make another version later.
Download and slice your tray
Choose 3MF or STL beside Download, then complete the steps offered for your account. In your slicer, select the printer and filament you will use and check the imported dimensions.
Place the flat bottom on the build plate. Inspect the first layers, the transition from floor to walls, and the narrow point of the heart. You are looking for a continuous floor and wall paths that remain connected throughout the tray.
Print one tray first. Its feel in your hand will tell you whether you want a deeper wall or more room inside the next version.
Where to take the idea next
Try Surprise Me for another outline, or keep the heart and make a taller companion. A pen cup needs a stable base and enough interior room for the objects it holds. Adjust its height and review the result from the side before slicing.
Make your heart tray. For a flatter tabletop project, follow the flower coaster tutorial.
Share this post
More to read
Author

Nora Lin
Nora explores playful shapes, thoughtful gifts, and small objects that make a space feel personal.