Design a 3D Printed Vase: A Beginner’s Guide
In This Article
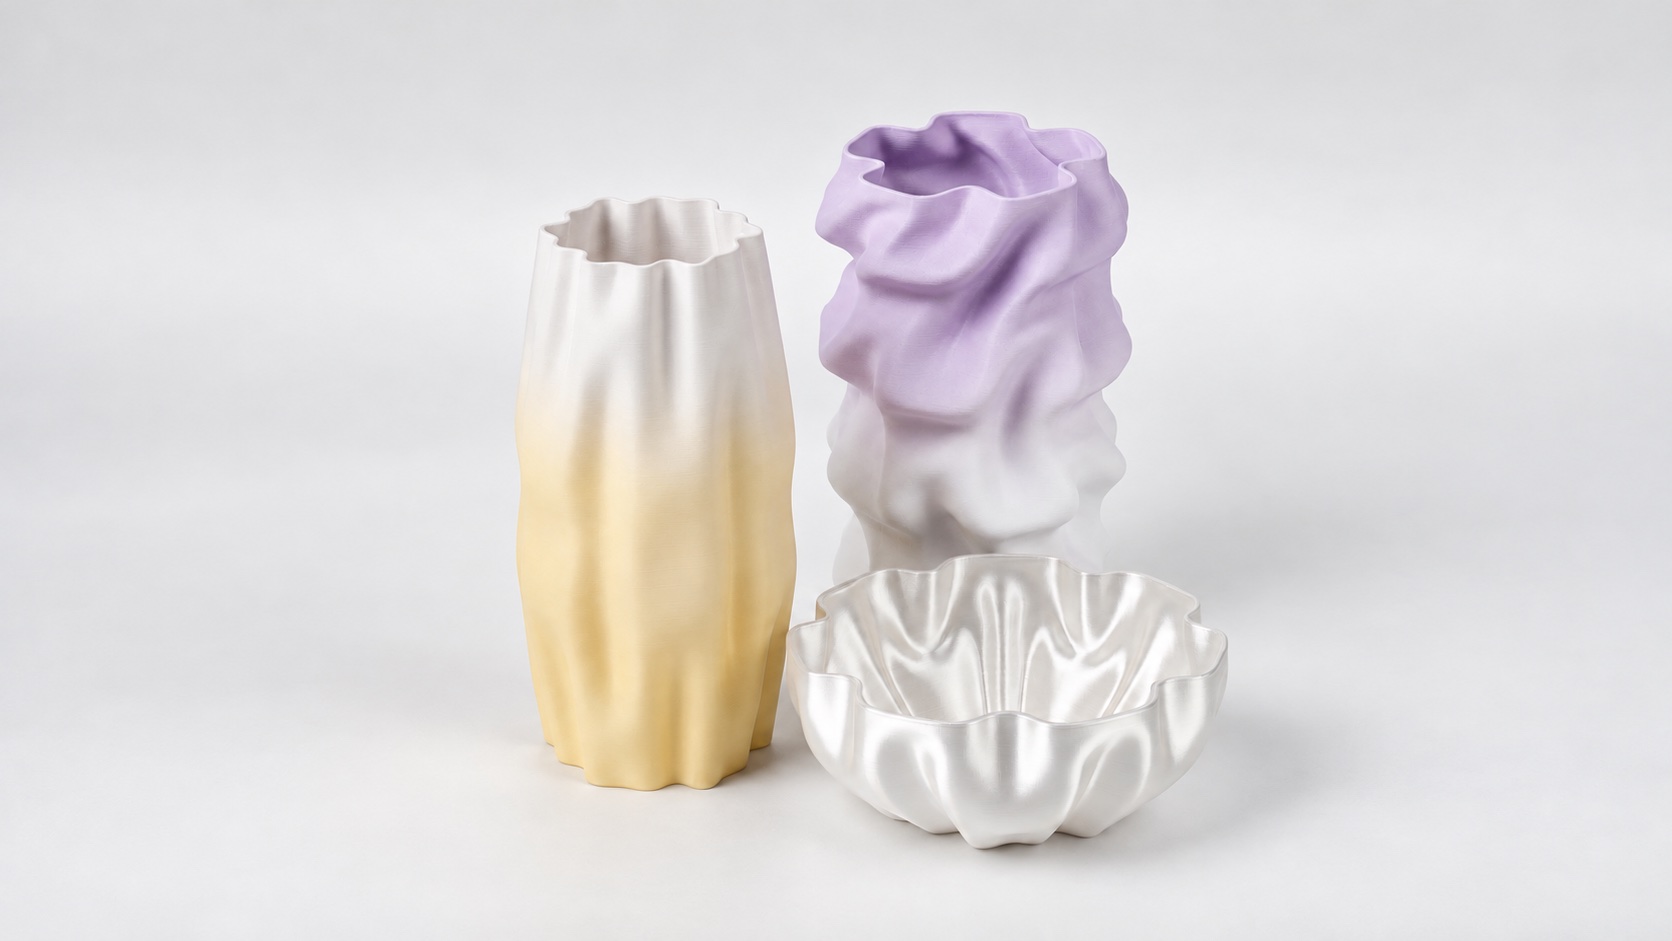
Design inspiration: fluted walls, sculpted profiles and a low bowl shape from the PrintVerse collection.
A small vase can give a shelf its own character. A rounded belly feels soft and generous; a narrow opening gathers a few dried stems into a neat arrangement. In PrintVerse, you can explore those proportions by changing a handful of dimensions and watching the shape update.
This walkthrough makes a 100 mm tall decorative vase with the browser-based Vase tool. You can download the model as STL or 3MF, then prepare it for your printer in a slicer. No CAD experience is needed.
Open the Vase tool to follow along.
Start with a small vase for dried stems
Open the tool and let the starting model finish loading. Our example uses the rounded starting shape, with a broad base and a gently scalloped opening. Keep that shape for your first pass; it gives you a clear reference as you adjust the size.
In Physical Size, click the number beside Height, enter 100, and press Enter. This field changes the height while leaving the other shape settings available for separate adjustments.
| Setting | This example | What to look for |
|---|---|---|
| Height | 100 mm | A compact shelf-sized form |
| Base Radius | 44 mm | A broad footprint |
| Top Radius | 44 mm | An open mouth for arranging stems |
| Wall Thickness | 1.4 mm | Continuous walls in the sliced layers |
| Bottom Thickness | 2.6 mm | A closed floor beneath the cavity |
Radius is half a circle’s diameter. The finished vase can extend beyond twice the base or top radius because curves and surface details add to its outline. Read the overall dimensions below the preview when checking shelf space or printer fit.
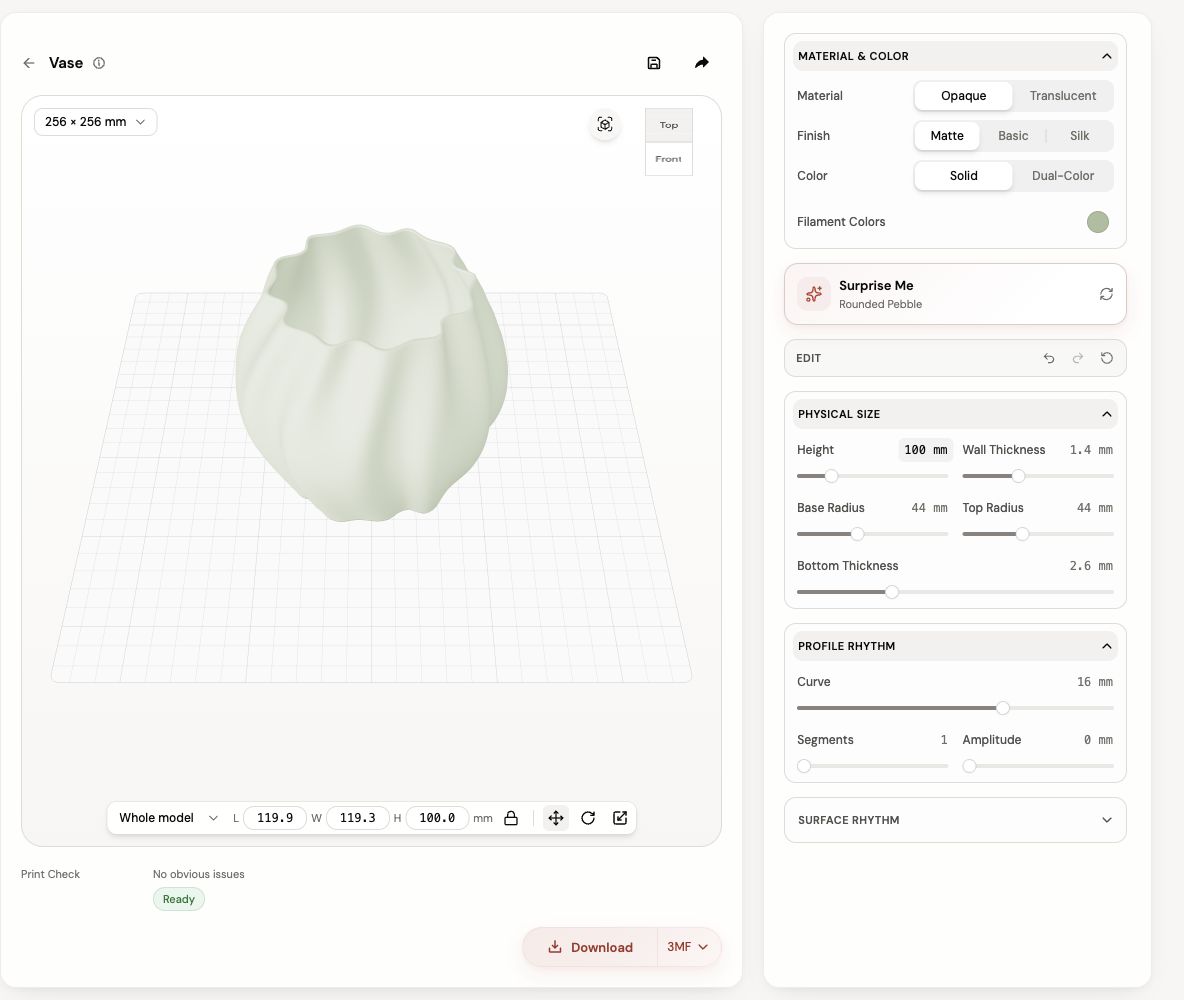
The height is now 100 mm. The other dimensions remain visible so you can reproduce this starting point.
Give the silhouette one clear idea
Open Profile Rhythm and make a small change to Curve. Watch the side outline: this is where you decide how full or slender the vase feels. Segments and Amplitude introduce repeated changes along its height.
For the first design, keep the profile simple. Then open Surface Rhythm and try a modest change to the folds or twists. Rotate the preview to see how the detail travels around the whole object. Undo lets you compare a change with the previous shape.
If you want a fresh starting point, Surprise Me offers another variation. Save a shape you like before exploring further, so it is easy to return to it.
Choose a color you already want to print
Use Material & Color to try a finish and filament color. A pale matte color makes the folds easy to read. Silk gives a different preview of the same surface, which can help you imagine a more reflective filament.
Use your actual filament and printer profile when slicing. The on-screen finish is a visual guide; the final appearance also comes from the filament, layer height and printing conditions.
Prepare the model for printing
Read Print Check, then inspect the opening, side walls and underside in the preview. Choose 3MF for a file that carries model color information, or STL for geometry. Follow the account and download steps shown by the tool.
Open the file in your slicer with your printer and filament profiles selected. Start with the normal slicing workflow: the model already has walls and a floor. Step through the sliced layers to check that the base closes properly and the walls remain continuous around the folds.
Spiral vase mode is a separate slicer setting. It builds a continuous single-wall path and changes several related settings. Use it only after confirming that your model suits that workflow; Prusa’s explanation of layers and perimeters explains how it works.
Can this vase hold fresh flowers?
For fresh flowers, place a suitable watertight insert inside and size the opening around it. For the first print, dried stems are a straightforward way to enjoy the form. A closed digital mesh describes the model’s geometry; water retention depends on the finished print.
Make a companion piece
Once you like the first shape, save it and try a second height while keeping the same color and surface rhythm. You will have a small family of objects with a shared visual character.
Create your vase, or make a matching heart-shaped tray with the Container tool.
Share this post
More to read
Author
Nora Lin
Nora explores playful shapes, thoughtful gifts, and small objects that make a space feel personal.