Design a 3D Printed Flower Coaster
In This Article
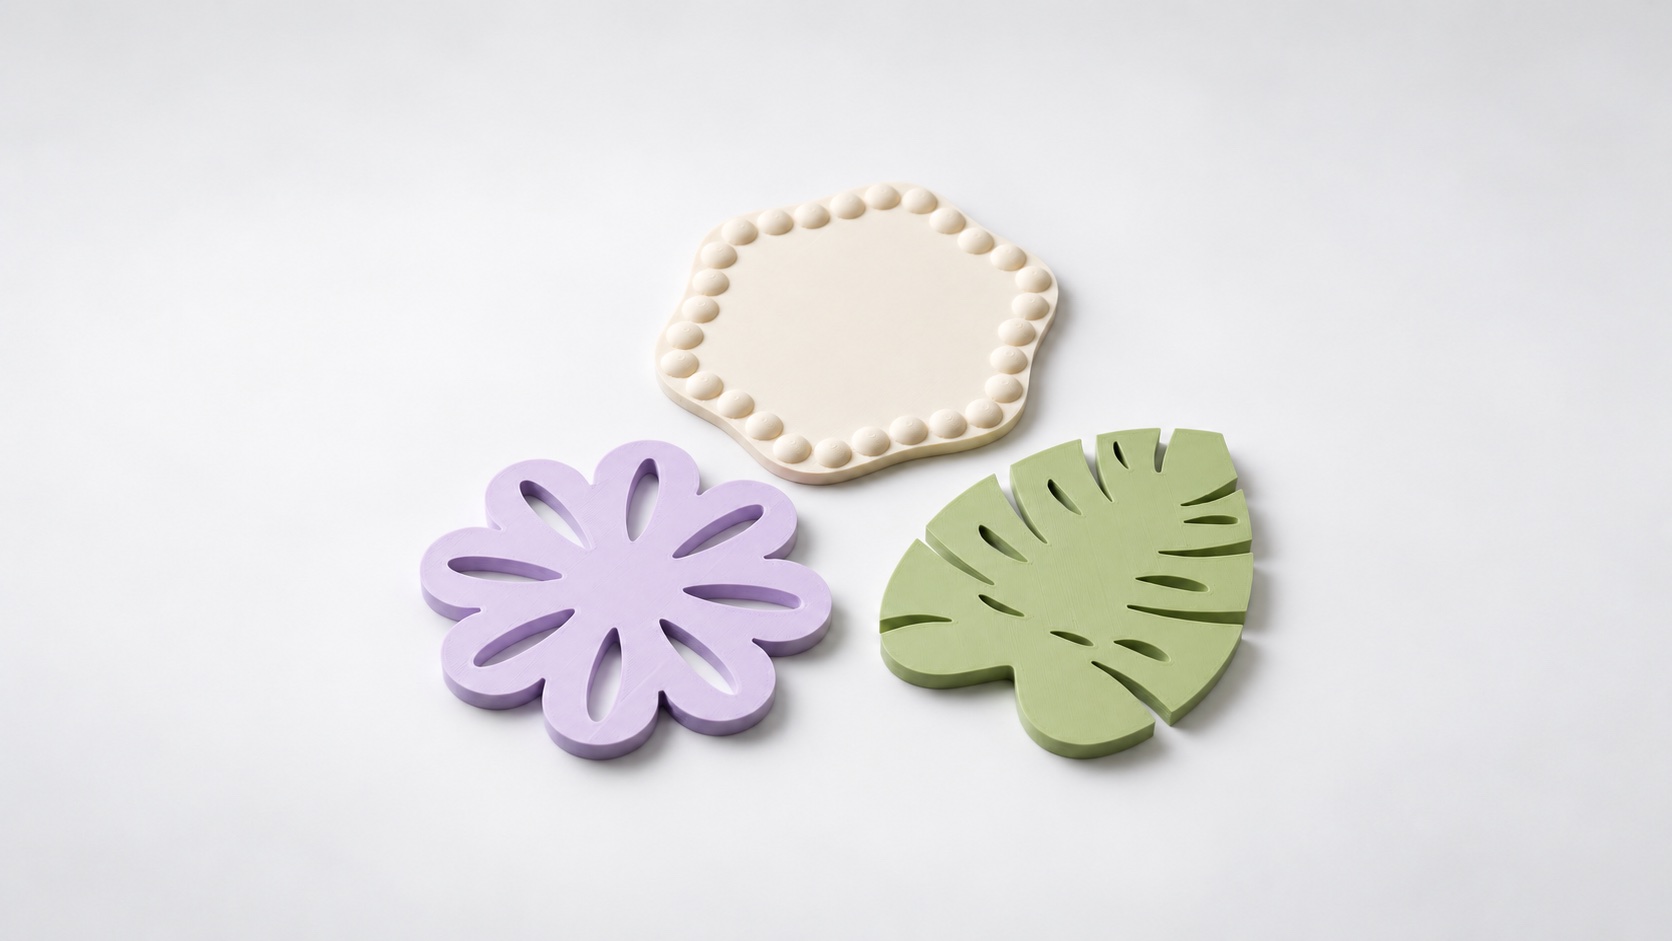
Design inspiration: bubble edges, an openwork flower and a leaf-shaped coaster.
A flower coaster adds a small, cheerful shape to a desk. The petals frame the cup, and a color you already enjoy can tie it to the rest of your space.
PrintVerse’s Coaster tool lets you edit the outline, size and surface pattern in your browser. This walkthrough starts with the 105 × 105 mm flower, then helps you choose a surface for the way you will use it.
Begin with the flower outline
Let the starting model load. It has rounded petals with openings through them, and a 4 mm overall height. You can keep the outline for the first version and focus on how it fits your cup.
Collapse Draw Path to bring Overall Size into view. The flower’s length and width scale together, preserving its proportions. Start at 105 mm and compare that size with the base of the cup you plan to use.
The overall width includes the petals. A cup needs a stable area of contact within the shape, so checking its base against the usable surface matters more than comparing it with the widest point alone.
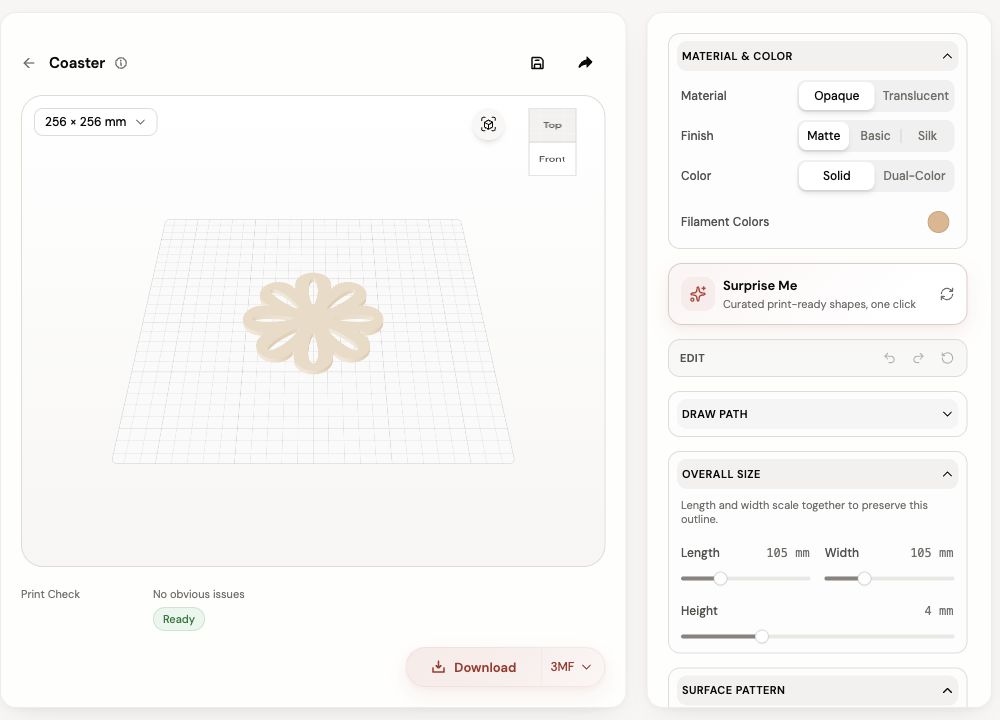
The flower begins at 105 × 105 × 4 mm. Length and width stay linked for this outline.
Choose how the surface should work
Open Surface Pattern. For this flower, Petals is the starting pattern and Openwork cuts the openings all the way through. Opening size changes their width.
Choose the surface around your intended use:
| Choice | What it does | When to try it |
|---|---|---|
| Openwork | Opens the petal pattern through the coaster | An airy decorative design |
| Engraved | Recesses the pattern into a continuous base | A more continuous surface under the cup |
| Raised | Lifts the pattern above the surface | A textured design, with cup stability checked carefully |
| None | Removes the surface pattern | A simple flower silhouette |
For a cold drink, remember that water can pass through openwork. A solid surface is a more useful starting point when catching condensation is the priority. Test the finished coaster on a washable surface before using it on furniture you want to protect.
Keep the first version simple
Choose one color in Material & Color and retain the 4 mm height while you explore the pattern. If you edit the outline, move one point at a time in Draw Path and watch the effect on the central cup area.
Surprise Me offers other starting compositions. The controls adapt to the current outline: flower and leaf designs have different options from rounded designs with rims or bubble edges. This lets you explore each shape through the settings that suit it.
When you find a version you like, save the project before trying another direction.
Check the file in your slicer
Read Print Check, choose 3MF or STL, and follow the download steps shown for your account. Open the result with your printer and filament profiles selected.
Keep the flat face on the build plate. In layer preview, look closely at the connections around the petal openings. They should remain continuous, with enough material to connect the outer shape to the center. For a raised pattern, also consider where the cup will make contact.
Print one first and place your intended cup on it. Check for rocking, sliding and whether the base sits comfortably within the design. That small trial is more informative than printing a full set straight away.
Make a coordinated set
Once the fit works, keep the same outline and dimensions across the set. Changing only the color gives you variety while the cups sit at a consistent height.
Choose filament for the temperatures and cleaning conditions you expect. Follow its maker’s guidance for hot drink use; a decorative material preview does not specify heat resistance.
Create your flower coaster, or add a matching tray for small desk items.
Share this post
More to read
Author
Nora Lin
Nora explores playful shapes, thoughtful gifts, and small objects that make a space feel personal.